The first introductory scene is available in the directory scenes_epita_ani3d/01_introduction/
- Each exercise is described as a unique program (with its own main) and must be compiled separately.
- A CMakeLists.txt is associated to each program for its compilation (+ a Makefile for Unix systems).
\(\Rightarrow\) Compile and execute the code of this scene.
Note: If you are not familiar with C++/OpenGL compilation on your system, follow first these instructions to compile the scene: Detailed Installation and Compilation Instructions
Adapt the directory to be compiled to your exercise
Notes on the requirements
- Your C++ compiler should be compatible with C++14.
- Glad is used to load function for OpenGL 3.3.
- GLFW is used to create a window and handle mouse/key events.
- ImGUI is used to handle GUI.
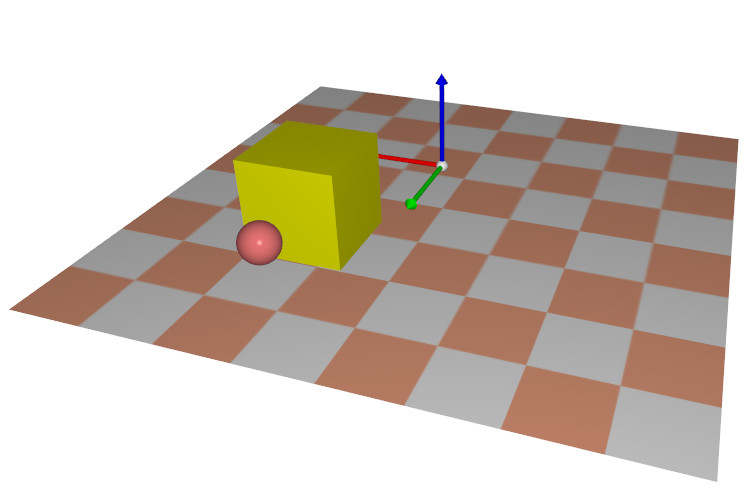
Once executed, you should observe a basic scene as seen below.
A camera model is already provided. The camera is defined by a position and an orientation relative to a center around which it can rotate. You should be able to interactively control the parameters of the camera as follow:
- Rotation: left clic + mouse displacement
- Get close/away from the center: right clic + vertical mouse displacement
- Panning (= translation in view plane): CTRL + left clic + mouse displacement
- Move forward/backward (= translation in orthogonal view plane): CTRL + right droit + vertical mouse displacement
General information on the code structure and editing
General structure of the code
Role of the different high level directories
scenes_[your-class]/ Contains the code associated to each 3D scene related to your class.
- One exercise starts with an independant main file (+ possible other files) and associated CMakeLists.txt for its compilation.
- The specific data and drawing calls of each exercise will be set in the files scene.cpp/hpp. The main.cpp file will only consists in the general call structure (initialization, events handling, animation loop). Most of the time, you will modify the code in scene.hpp (or other specific sub-files), and won't have to modify anything in main.cpp.
- Changing exercise consists in compiling the code from another directory.
- All your code will take place in these directories (unless you want to modify the library).
library/cgp/ Contains the actual source code of the CGP library: set of structures and functions to ease generating your 3D scene.
library/third_party External library used by CGP such as glad (OpenGL loader), imgui (GUI), lodepng (loader for png images), etc.
Code editor
The library contains multiples files. Make sure you use a sufficiently advanced (or well parameterized) IDE to have
- C++ code completion (in particular complete function names, display expected arguments and types, objects arguments, etc.)
- Efficient switch between files and jump to the signature and code of any function and object.
Note: Visual Studio Code and other lightweights text editor usually doesn't provide by default correct C++ code completion.
If you are not already familiar with C++ code editor (in Linux/Mac), you may try QtCreator, a C++ IDE able to load complete project from the CMakeLists.txt, and providing usefull tool such as code completion and structure navigation (in Windows, Visual Studio is the default IDE for C++).
Finally, note that the code should be executed from the root of the code directory (the directory containing the CMakeLists.txt of the corresponding exercise) in order to load external files at runtime. You may need to parameterize your run directory in your IDE (ex. QtCreator) to start the executable within it.
Use of the code library and program structure
Adding a shape in the scene
We will see an example of creating and adding a shape (a triangulated sphere) in the 3D sphere.
This is done in 3 steps using the files scene.cpp and scene.hpp:
a. Create a class attribute of type mesh_drawable in the definition of the class scene_structure in the file scene.hpp
mesh_drawablesphere;
b. Initialize the content of the sphere in the function initialize()
c. Call the drawing of the mesh_drawable variable at the end of the display_frame function
draw(sphere,environment);
> Recompile and run the new code, a white sphere should appear at the origin of the scene.
Note that there is two type of mesh structures in use
- mesh storing buffer on data (per vertex: position, normal, uv, color, and triangle connectivity) on CPU
This structure allows to conveniently access to all the data defining a mesh from the C++ code. However these data are not on the GPU, so a mesh cannot be directly displayed.
- mesh_drawable storing VBOs associated to these buffer once sent on the GPU memory (in the sub-structure mesh_drawable_gpu_data) as well as its VAO. The structure also stores uniform parameters that are sent to the shader at every draw call. A default shader and texture id are also be stored with the structure.
This structure only stores the index corresponding to elements on GPU. You cannot modify individual per-vertex elements easily from this structure.
In the case of the example:
- the mesh structure (sphere_mesh) is used to initialize the positions and the connectivity of a meshed sphere shape stored on the CPU. This structure is only stored temporary in the initialization function, and used to fill the VBO in the mesh_drawable variable (sphere) using the call [mesh_drawable].initialize_data_on_gpu([mesh]) .
- the mesh_drawable variable must be defined as a "class-level" attribute (and not as a local variable in a single function) as it is used in both the initialization, and the drawing_frame.
Modification of the sphere
You can adapt some global parameter attach to the shape such as its material (color, shading), and model matrix (translation, rotation, scaling) in modifying pre-defined variables of the mesh_drawable class.
For instance, write in the initialize() function (after the line sphere.initialize_data_on_gpu(...)):
// to add after "sphere.initialize(sphere_mesh, "Sphere");"sphere.model.scaling=0.2f;// coordinates are multiplied by 0.2 in the shadersphere.model.translation={1,2,0};// coordinates are offseted by {1,2,0} in the shadersphere.material.color={1,0.5f,0.5f};// sphere will appear red (r,g,b components in [0,1])
> Re-compile and run again the code to observe the modification.
Notes:
- The previous variables are used as "uniform variables" by the shader during the draw call.
- These parameters are simple variables on which you can assign new values at any time (they are all attached to a default value when initializing a mesh_drawable).
Load external mesh
CGP library provides pre-coded basic primitives (spheres, cube, cylinder, cone, etc) via the call "mesh_primitive_xxx". For more complex shapes, you can also load a mesh from an external file (dowloaded file or created from 3D modeler such as Blender) using the obj file loader provided by default.
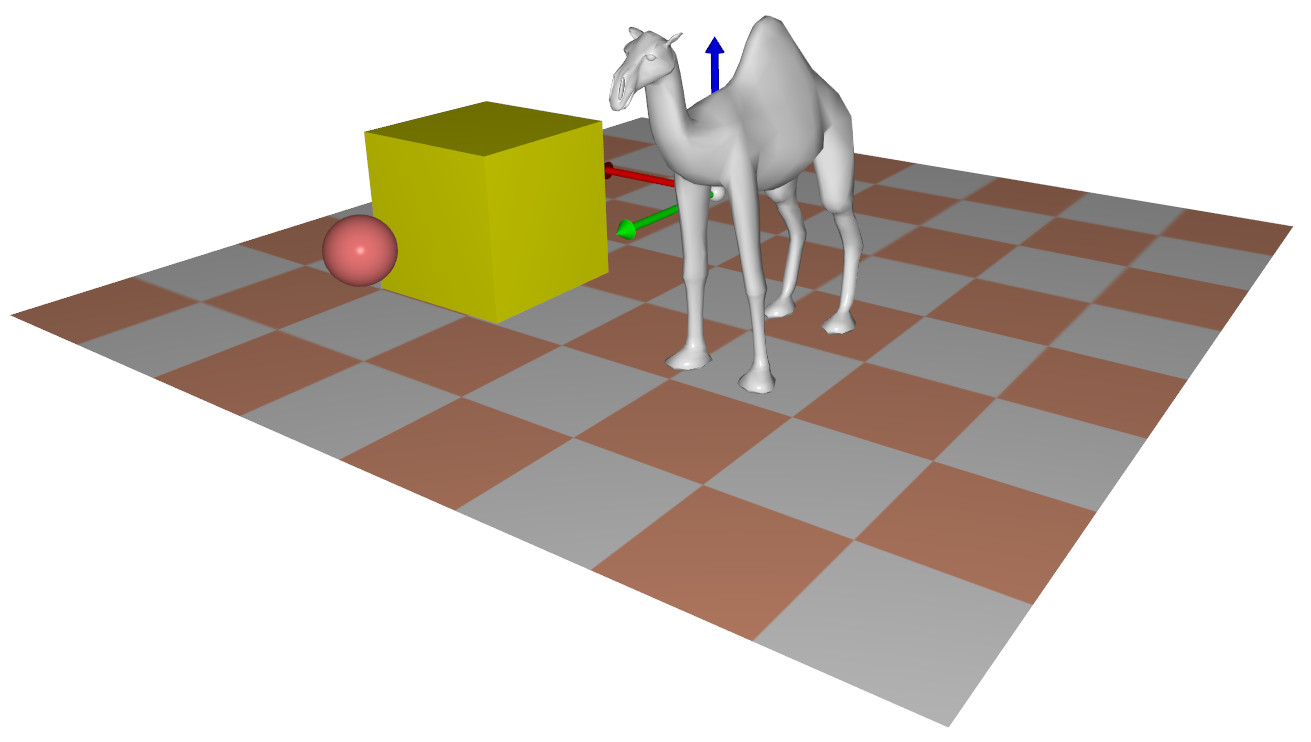
This example shows the load of a file representing a camel.
- Create the class attribute (in the scene_structure in the file scene.hpp):
mesh_drawablecamel;
- Load the mesh from the file and initialize mesh_drawable in the function initialize().
// mesh_load_file_obj: read a .obj file and return a mesh structuremeshcamel_mesh=mesh_load_file_obj("assets/camel.obj");// Classical initialization of a mesh_drawable structurecamel.initialize_data_on_gpu(camel_mesh);// Adjusting size and position of the shapecamel.model.scaling=0.5f;camel.model.translation={-1,1,0.5f};
- Add the draw call in the function display_scene()
draw(camel,environment);
Wireframe draw
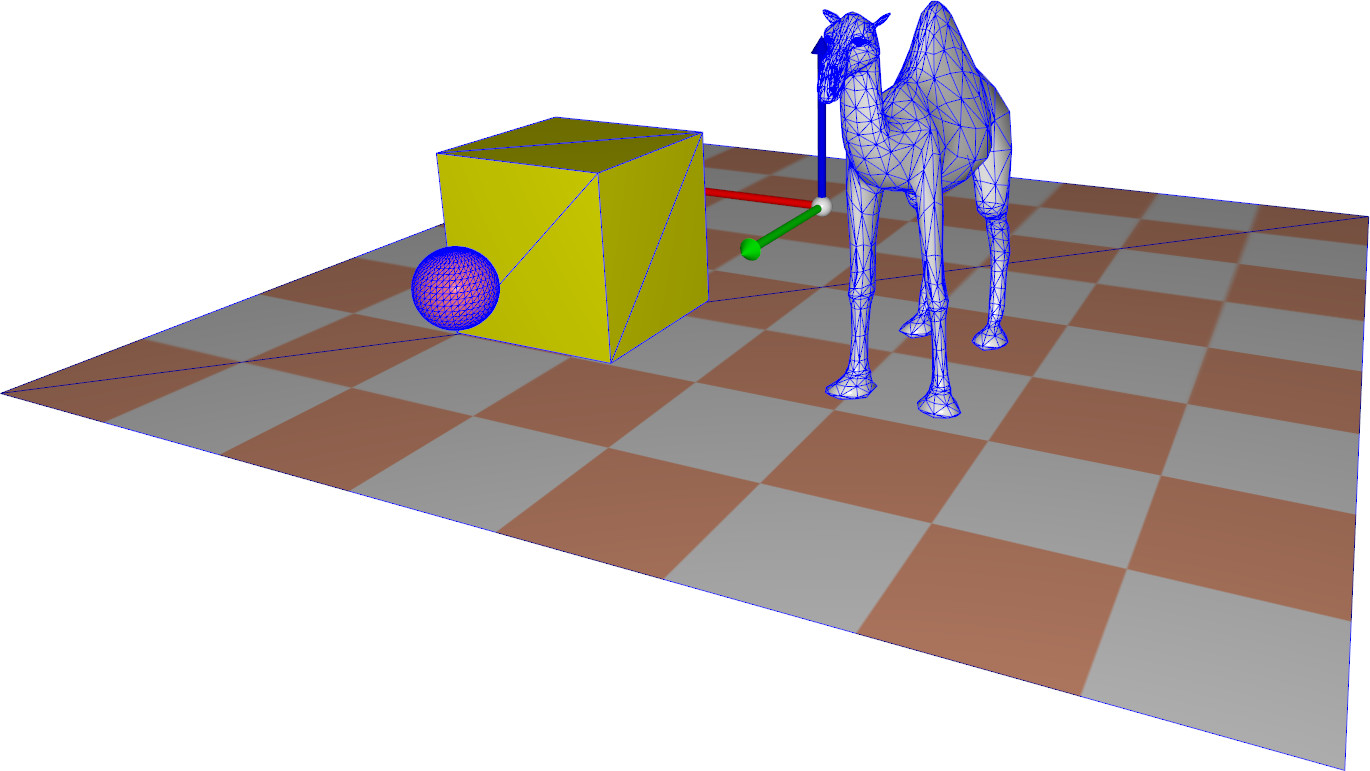
It is often usefull to visualize the mesh in wireframe to better understand the triangulation structure and/or debuging. The function draw_wireframe(mesh_drawable, environment) is provided by the library to this end.
Add the following lines in the display_frame() et observe the additional wireframe display.
Note that the wireframe is displayed in blue color by default. A specific (r,g,b) color can be set when calling the function as in the following:
// Wireframe displayed in red thanks to the third argument {r,g,b}draw_wireframe(camel,environment,{1,0,0});
Checkbox interface
We will now add a GUI checkbox (button that can be checked) to activate/deactivate the wireframe display of the sphere.
The principle is the following:
a) Create a boolean class attribute storing if the wireframe display should be activated or not. To keep a clear structure, this variable can be added in the gui_parameters class (in file scene.hpp), which is itself a variable of the scene structure (gui).
> Add the following variable in the definition of the structure struct gui_parameters (in the file scene.hpp) to store a boolean state indicating when the wireframe should be displayed or not
b) In the function display_gui() (in scene.cpp) add a Checkbox (handled by ImGui library) and link it to the variable display_wireframe in adding this line of code
Check that you can now interactively display the wireframe representation of the sphere.
Placing several similar elements
> Add multiple cones in your scene using the following syntax:
// (In the scene_structure header)std::vector<vec3>cone_positions;mesh_drawablecone;
// (In the initialization function)cone.initialize_data_on_gpu(mesh_primitive_cone(0.1f,0.2f));constintN_cone=40;for(intk=0;k<N_cone;++k){floatx=rand_interval(-2,2);floatz=rand_interval(-2,2);cone_positions.push_back({x,-1,z});}
// (In the display_frame function)for(intk=0;k<cone_positions.size();++k){cone.model.translation=cone_positions[k];draw(cone,environment);}
Display the scene and observe the result (you should see a set of cones on the floor)
Note that
- Only one cone is created and stored in memory
- This single cone is displayed several times at different pre-stored positions
- What would have happend if the loop initializing the variable cone_positions was placed in the display_frame function instead of initialization ?
Exercise
Adapt the code to model the following scene
Note that trees should not intersect each others
(your algorithm doesn't have to be optimal in complexity)
 Download code_epita_ani3d.tar.gz
  Download code_epita_ani3d.zip